HMS PEGASUS (1776) in Scale 1/64 (Workshop on examples/Практикум на прикладах)
- Olha Batchvarov
- Aug 25, 2023
- 3 min read
Step-By-Step Guide for beginners/ Покроковий посібник для початківців
Chapter #12/Розділ №12
Painting/Розпис

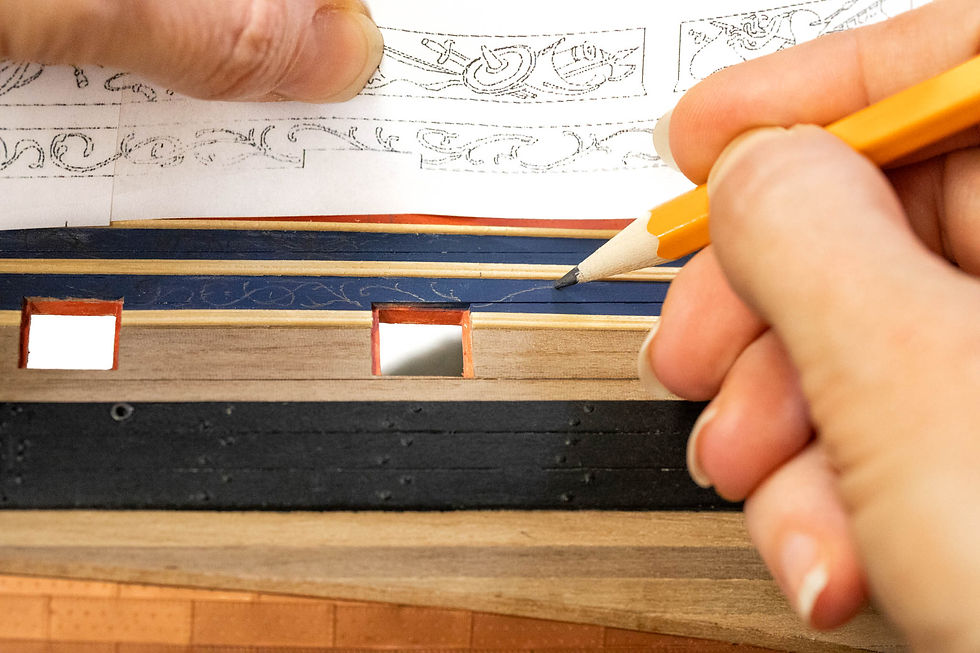
Typical plant friezes were painted in 1770-1780. On them you could see the contemporary types of weapons and regalia. This is a very beautiful part of the model that is completely neglected by the manufacturers. You can find cheap "gnomes and birds" photo-etched from brass in the kit, or at most you will be offered to stick a paper imitation. But with a little practice, you can paint them without any problems, even at a less convenient scale, like this 1:64 scale HMS PEGASUS...
Типові рослинні фрізи розписувалися в 1770-1780. На них можна було побачити тогочасні види озброєння і регалії. Це дуже красива частина моделі, яка абсолютно нехтується виробниками. Ви можете знайти в комплекті недолугі "гномики і пташки" фототравлені з латуні або максимум вам запропонують приклеїти паперову імітацію. Але з невеликою практикою ви можете намалювати їх без проблем навіть у такому не дуже зручному масштабі, як на цьому HMS PEGASUS в масштабі 1:64...

12.1. Samples:
Before drawing on the model, first try to "fill your hand" on paper. Or make a piece of planking from scraps of planks and get the most realistic sample. Also, in the process, pick up the paint, try to mix it or apply it in layers. Starting with the darkest shade and ending with the lightest to create volume. On the more complex parts of the friezes, do not forget the basic rule of contrast "We paint light on dark and dark on light."
- Apply a pencil drawing of friezes;
- Apply the first layer of darker paint that will simulate shadows. If the paint is very thick, it can even be diluted a little so that this layer is as thin as possible;
- Then alternately apply as many layers of paint as you have planned on your project. Moving from the darkest to the lightest shades.
- If there are no friezes on your model, go to the next chapter.
12.1. Зразки:
Перш ніж малювати на моделі, спочатку спробуйте "набити руку" на папері. Чи зробити шматок обшивки з обрізків планок та отримати найбільш реалістичний зразок. Також в процесі підберіть фарбу, спробуйте змішувати її чи наносити шарами. Починаючи з найтемнішого віддтінку і закінчивши найсвітлішим, щоб створити об'єм. На більш складних частинах фризів, не забуваємо про основне правило контрасту "Світлим малюємо на темному і темним на світлому".
- Нанесіть олівцем малюнок фризів;
- Нанесіть перший шар гайтемнішої фарби, яка буде відображати тіні. Якщо фарба дуже густа, то її можна навіть трохи розвести, щоб цей шар був максимально тонким;
- Потім по черзі нанесіть стільки шарів фарби, скільки ви запланували на вашому проекті. Рухаючись від темних до найсвітліших віддтінків.
- Якщо на вашій моделі немає фризів переходьте до наступного розділу.

12. 2. Pattern:
On this model, I used the pattern diagram that David Antcherel published in his practicum, in 1:48 scale. For the convenience of transferring the picture to the model, it can be scanned and scaled to our 1:64. Also mirror for the port side, because only the starboard side of the ship is available in the practicum. I use photoshop but nowadays there is enough free software that can handle these tasks without any problems.
- Scan the scheme with friezes;
- Scale (if desired or leave larger to see details clearly) and mirror the drawing to have them for both sides;
- Print and glue the templates.
12. 2. Візерунок:
На даній моделі я використовую схему з візерунками, яку Девід Антчерел опублікував у його практикумі в масштабі 1:48. Для зручності перенесення малюнку на модель, її можна відсканувати і відмаштабувати до нашого 1:64. Також відзеркалити для лівого борту, бо в практикумі відображено лише правий борт корабля. Я використовую фотошоп але сьогодні існує достатньо безкоштовного програмного забезпечення, яке справляється з цими задачами бещ питань.
- Відскануйте схему з фризами;
- Відмаштабуйте (за бажанням або залиште у більшому розмірі щоб чітко бачити деталі) та віддзеркальте схему, щоб мати їх для обох бортів;
- Роздрукуйте та склейте шаблони.

12. 3. Layers of paint:
- Repeat all steps as in point 12.1. only directly on the model.

Advice/Порада: The paint should be mixed from dark to light at the tip of the brush./Змішувати фарбу слід від темного кольору до світлого на кінчику пензля.
12.3. Шари фарбування:
- Повторити всі кроки, як в пункті 12.1. тільки вже безпосередньо на моделі.

I filmed the whole process in detail and made this video for you! You can find a playlist with the construction of HMS PEGASUS on my YouTube channel, and ask any questions to which you did not find the answers here!
Весь процес я зняла в деталях на відео і зробила для вас цей випуск! Ви можете знайти на моєму каналі плейлист з будівництвом HMS PEGASUS, та задати питання на які ви не знайшли відповіді тут!


Comments