Schooner Columbia 1923
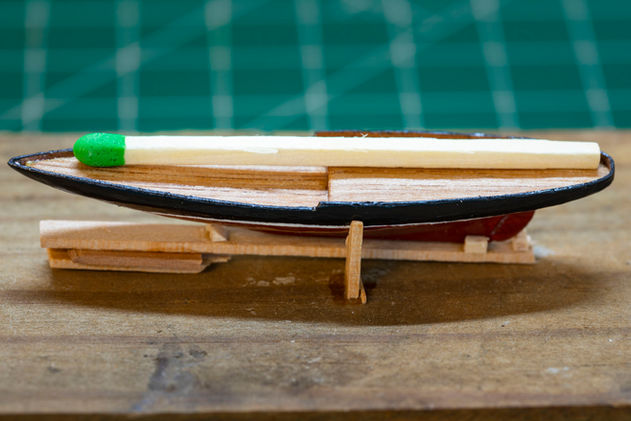
The Columbia schooner 1923 became my first model in a bottle and it came as a result of moving to a new country, until I have a new workshop and have no opportunity to continue a large project - I can try myself on a small scale M 1:640. I have long wanted to try to build a model in a bottle with only a scalpel, a cutting mat and a drill. So, finding a "nice" bottle of rum in the bar, forced her husband to empty the liquid contents and began to select the scale and method of construction.
1. Preparatory work.
The most boring but so important part of the job. Prepare templates with cross sections of the frames and wash the glue bottle. This is probably the hardest part - to remove the glue from the glass after soaking the label. Even the high temperature of the dishwasher did not wash it. But I had on hand a solution of acetone - a liquid that is always in a cosmetic bag to wash off nail polish. He has never let me down, and here he coped perfectly with the task of removing the sticky and viscous glue. Exactly what acetone is - in the video, a closeup shot of the bottle in the first issue of the construction process.
2. Manufacturing of the case.
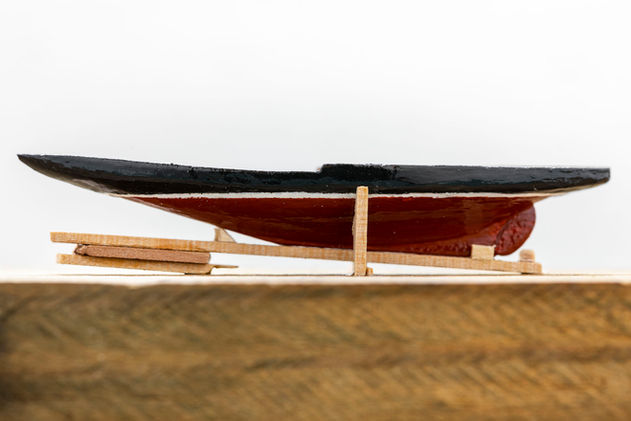
The most important step on which the whole look of the model depends is to reproduce the precise contours on a tiny scale. Therefore, it was decided to make reverse sections on the frames and to control them by mulling the two halves of the case. That is how I decided to make the body, because then it would still be painted, so I would have a central part - a keel and two halves with sides. How I formed the left and right sides - I showed in the same clip with the process of the first issue. Noting the pencil where it is necessary to grind and remove unnecessarily with the help of drill bits.
3. Preparing the body for painting.
Having received two symmetrical halves of boards - pasted them on the central circle. Of course, having received a solid hull, it had to be slightly deflected, especially under deck decks. But to build up the sides and where to put it. She expanded the board with veneer using a soldering iron for bending and shaping and welding in place. Then again, the entire body was unmuted. Painted with a brush, as the bottle still hides such small imperfections as marks from smears. She additionally covered with a varnish spray to give glossy gloss and monolithic coverage.
4. Stocks.
For the convenience of further construction on such a small-scale boat - had to make a stocks. It will serve as the stand right up to the very installation of the model in the bottle. That is, it will have to build, adjust and fold the mast so that it can then easily be lifted together with the sails already in the middle of the bottle. Here it is necessary to take into account the length of the tweezers, as it turned out, they are almost all short, but I will come up with something then or else I will have to look for new long tweezers - they are definitely never unnecessary.
5. Details.
This is where the flea dance began. Even sometimes you can't breathe once again because then you look for all that stuff on the floor. Here once again I became convinced that having a white floor in the workshop is the most ideal option - you can immediately see where a particular cod (and in the scale is a whole felling) stabbed in the M1:640, which I brushed with a nail head for sewing products. I showed the rudder base how to make a video in the first installment of the construction process. After this model, I will never again say that the M1:84 is very small, but my favorite is still the M1:48 in this, I was finally convinced. It allows you not to imitate, but to really produce genuine parts-copies.
6. Masts.
The hardest thing was to come up with a mechanism for assembling masts to carry the model into the bottle, but the decision came by itself. I hid the hinge in the racks under the tile-laths. Simply by installing a section of wire and drilling a mast saw at the base. When lifted into the correct position - even the presence of the hinge is not visible, which I was very pleased. So I chose the simplest model and the simplest method of fitting into a bottle - that would be pulling a single rope, or rather 3 rods - I would have a completely schooner ready. As long as the sails are being prepared, I do not attach the staple boards and staves immediately, as the sails have yet to be installed. Once installed, it will already be possible to finally tighten the screws and secure them not directly on the boat, but on the boat. In this position, it is easy to adjust the rest of the mast and remove the sails.
7. Sails.
This is my favorite part on every model, so I always sew the sails on my own because it is the greatest magic of any vessel. As always, I use shirt fabric. For imitation of sewn cloths - has decided to pull threads. That is, paint half of the fabric and stretch from the painted part of the brown thread to the clean part of the fabric where the sail patterns will be. In scale, every 13 threads had to be pulled and this was probably the most responsible part of the construction. Because the threads are very thin and easily torn, so it is necessary to do very slowly and delicately, but the result is worth the effort.
8. Moving to the bottle.
Throughout the process, I get asked the question, "does it then go into the bottle" - is this the case for every bottler modeler? At the crucial moment of "truth", when it was time to check how the finished model would fit - it turned out that the bars between the grotto and the mast do not allow it to be done - one had to chew and cut - it was removed in the second roll with the process. But this is also my first model in a bottle - it is necessary to feel how it is to build such models.
9. Water imitation.
The model is small, and the bottle and so massive enough, so I decided to make transparent water - that is, to use resin, coloring it in the color of the sea wave. She first glued the schooner in the bottle, using a temporary slip that just kept her in the correct position. After that, I already poured colored resin into the bottle. This stage of work is demonstrated in great detail in the second part of the video process.
10. Stand.
The model of the ship, as an artist's painting, should have a frame, that is, a stand. Finishing that will give a complete look. In my case, there was still a big black plug that kept drawing attention from the schooner, so I also decorated it with a rope. The construction of the stand is also demonstrated in detail in the second part of the video process.


Conclusion: The pleasure of the process is no less than a large linear sailboat. For the first model in the bottle, you really need to choose simpler ships with less rigging. And having received the first experience - to build "right" what you want! You can see all the details of the schooner in the bottle as usual on my YouTube channel:


