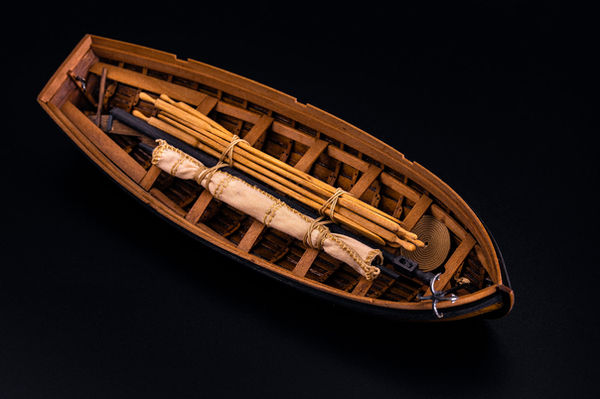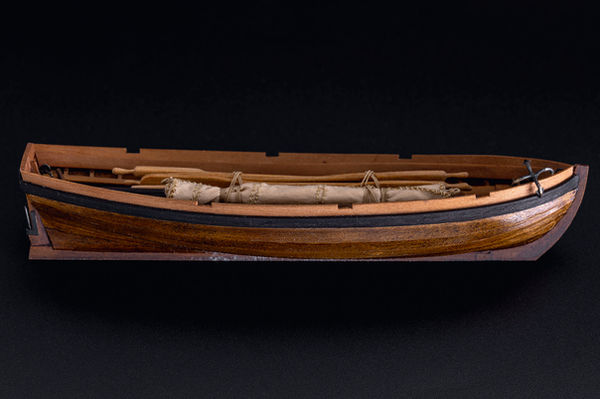
Production of clinker boats:

This is a model for a model that also needs a lot of attention. Boats occupy the center of the deck of the vessel and should look like they are true to their scale, so the details are made thinner and more fragile. I'll show you how to make them beautiful and easy. At least the look will be like the real ...
Production:
The work can be divided into several stages:
1. Production a workpiece;
2. Kiel;
3. Hull trim;
4. Arrangement of frames;
5. Installation of internal arrangement;
6. Oars and other trinkets for the boat;
7. Mast and rigging;
8. Sail.

1. Making a workpiece for the boat:
First of all, we make templates (plastic or cardboard) in order to control the shape. Necessarily middel-frame and a few extra in the bow and stern.
We select a bar of the necessary thickness (I did not have the right one - I had to glue) and we roll out two halves of a jar. Given that we will glue them together later when the template for the keel is ready. The main thing is to make both halves as symmetrical as possible. This can then be reused for how long the clinker boats need to be made. So this is a very important and responsible stage ...


2. Kiel:
Also, using a template, we make the work-piece of the future keel. The template is glued to the jar, so it is 2 mm thick (I used plastic to not cut the plate out of wood), as was keel.
The template is recessed into the work-piece to allow the keel to fit easily, also by 2 mm. The keel itself is made with stock, because it is easier to work with - then it can be easily trimmed and sized. This is to be able to correct cladding errors if suddenly the boards are in the wrong position ...


3. Sheathing:
Before starting work, it is better to mark the roll to symmetrically attach the boards on both sides. To pinch the rails accurately, I drilled a jar under the stationery buttons.
The first is the transom, and then the sides. The trim rails are cut to a thickness of 0.6 mm. They must be glued exclusively between them so that the adhesive does not get on the jar. So that a removable clinker shell comes out ...


4. Arrangement of frames:
Once again, using a pencil, make a mark. According to the drawings, the frames consist of floral timbers and top timbers. Cut billets for frames with a thickness of 0.6 mm and a width of 0.8 mm. Such straws turned out that without a colander, on the eye, it is not visible where the width is.
First, we paste the flor-timbers, pre-bending the workpieces, and then the top timbers. To simulate the mounts, I made a notch with a hand drill and dyed it with a regular pencil to give it a voluminous look. This is shown in detail in the video interview below ...


5. Installation of internal arrangement:
It is possible to start with a kelson and a sub-class for further installation of jars. Also at this stage I painted the body from the outside.
Made a variety of velvet and pole and completely completed the extension of the sides of the boat. The final stage of this phase is the installation of cans and pilers under them ...


6. Oars and other trinkets for the boat:
There are always oars on every such small boat. I added another barrel and anchor. But you can not limit yourself to this ...
Additionally make buckets, baskets, coves, buckets for running out of water. You can also fill the boat with a mast and rigging, as they were lifted only when the boat is lowered. Also, the sail was carefully fitted with the mast. Their manufacture - below ...


7. Mast and rigging:
For the mast, I chose black hornbeam blanks so as not to paint these details.
A 4x4 mm workpiece is required for the mast, as it has a pulley at the top. The same with the square billet had to make a round section. For the rye I used a 3 mm workpiece ...

8. Sail:
For sails, I use either a baptist or any stretch fabric that is often used to make shirts. They have a fine texture and stretch marks can be used to depict wrinkles as genuine stretch marks.
The size was selected from a paper template, and the method of sewing the sail I will outline separately in my secrets, as it is a separate topic with many nuances. Including painting and blowing the sails ...


The equipment of the boat can vary depending on whether it will be installed on deck or it will be shown next to the model under raised sail. So I'll show you another photo process where I made another version of the clinker boat for installation on the deck:
A small video in which on the example of this boat I tell and show the moments of making wooden models. For the directors it was a shock that the model of the hour and even in a day does not build, that for such a boat it is necessary to work a week uninterruptedly - so there is an installation here, and the boat 2)))
Another video showing the process of building a clinker boat for the French cutter Le CERF in 6 and a half minutes, which took me a whole week of hard work:


